How to Show Image Using File Upload

![]()
How to Preview image before uploading in Javascript
In this article, I am going to show you how to create a custom epitome upload and preview blueprint. Paradigm Preview is a great arrangement where you can check before uploading an epitome whether the epitome is eligible for upload.
This is a very uncomplicated system that you can only create with the help of HTML and javascript. But here I take used a small-scale amount of CSS to design it.
✅ Sentry Live Preview 👉👉 Prototype Upload With Preview
HTML has many types of input functions, one of which is text, passwords, emails, etc. that we always use. There is also some other blazon of input known equally the file input (<input type=" file">). Here you tin utilize any type of file for input.
This is similar to the general input design. Only 'File' will be used instead of 'Password' or 'Email'. It will receive the file from your device and and then evidence it as a preview. Still, to do this image preview, you have to have the assistance of JavaScript or JQuery. Here I have created this image upload and preview design using Pure JavaScript.
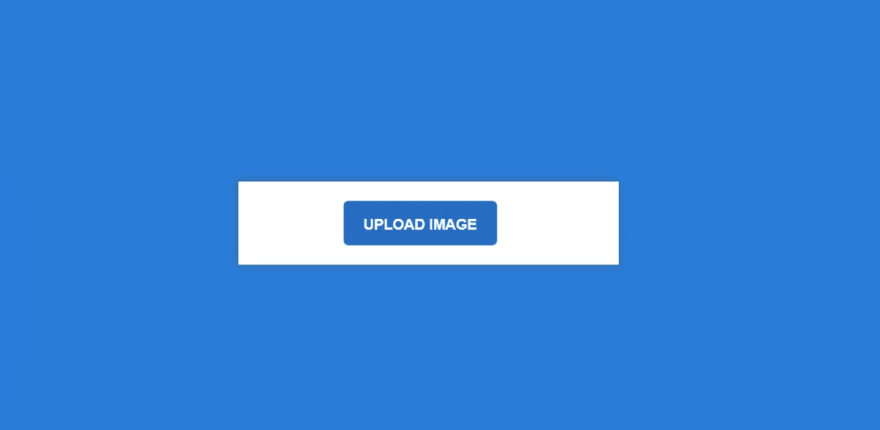
Preview image before upload
At present is the time to fully understand how it is made. Before starting the tutorial, let me tell yous some important points. First I designed the spider web page using some CSS. And then I created a box on the webpage. I made a small button using the input in that box.
I used a level to make this button here. With this, I accept fabricated a minor brandish for previewing the epitome. I implemented it using JavaScript at the cease of information technology all. Let's take a look at how to make it in the full step below.
Pace 1: Design the webpage with CSS
Get-go I designed the web folio using CSS code. Hither nosotros have set the background colour of the spider web page every bit blue and the height as 100vh.
body { margin : 0px ; tiptop : 100vh ; background : #1283da ; }

Step 2: Create the basic structure of the paradigm preview
At present I have made a small box on the spider web page using some basic HTML and CSS. As you can come across above, paradigm previews and buttons are all in this box.
The width of the box is 350 px and the background color is white. I have used some box shadows here which have made information technology brighter and more attractive.
<div grade= "center" > <div course= "class-input" > </div> </div>
.center { height : 100% ; display : flex ; align-items : center ; justify-content : center ; } .class-input { width : 350px ; padding : 20px ; background : #fff ; box-shadow : -3px -3px 7px rgba ( 94 , 104 , 121 , 0.377 ), 3px 3px 7px rgba ( 94 , 104 , 121 , 0.377 ); }

Pace 3: Create a place to preview the epitome
I made a small display to view the previewed prototype. Although it cannot exist seen in normal conditions. This can only exist seen when nosotros implement it with the help of JavaScript.
<div class= "preview" > <img id= "file-ip-1-preview" > </div>
.class-input img { width : 100% ; display : none ; margin-bottom : 30px ; }
Step 4: Create input boxes and buttons
Now I have created an input box using file input and created a button there. I used the level of input to make this button. Later, using CSS, I gave that level the shape of a button. Button height 45 px and width 45%.
<characterization for= "file-ip-1" >Upload Prototype</label> <input type= "file" id= "file-ip-ane" accept= "image/*" onchange= "showPreview(event);" >
.form-input input { brandish : none ; } .form-input label { brandish : block ; width : 45% ; height : 45px ; margin-left : 25% ; line-elevation : 50px ; text-align : centre ; background : #1172c2 ; color : #fff ; font-size : 15px ; font-family unit : "Open Sans" , sans-serif ; text-transform : Uppercase ; font-weight : 600 ; border-radius : 5px ; cursor : pointer ; }
Pace 5: Activate Epitome Upload with JavaScript code
As you lot can see above, we have designed it completely. Now I will implement this image preview organisation with the assistance of JavaScript.
function showPreview ( event ){ if ( event . target . files . length > 0 ){ var src = URL . createObjectURL ( upshot . target . files [ 0 ]); var preview = certificate . getElementById ( " file-ip-one-preview " ); preview . src = src ; preview . style . display = " cake " ; } }

After using js, image preview and upload will be fully effective. And then when you click on the upload button, you will see a preview of whatever image you select from your file.
Related Mail:
- Uncomplicated Weather App using JavaScript
- Brand a Todo List using JavaScript
- Uncomplicated Stopwatch using JavaScript
- Javascript Age Calculator
- Random Countersign Generator with JavaScript
- Automatic Paradigm Slider in Html, CSS
- Sidebar Carte Using HTML CSS
Hopefully from the tutorial to a higher place you take learned how to brand an image upload with preview. I take already created a system of multiple image previews using JQuery.
You can visit my web log for more tutorials like this.
https://www.foolishdeveloper.com/
campanellicanalountes.blogspot.com
Source: https://dev.to/shantanu_jana/how-to-preview-image-before-uploading-in-javascript-1f6g
Post a Comment for "How to Show Image Using File Upload"